Learn to Tie Shoes with Pictures: A Visual Guide for Success
Tying shoelaces might seem like a simple task, but for many—especially children—learning to do it independently can be confusing and frustrating. The good news? Mastering the art of securing your shoes is easier than ever, especially when you embrace **learning to tie shoes with pictures**. Visual learning offers a clear, step-by-step method that transforms a tricky skill into a manageable challenge. This blog explores how pictures and clear instructions make shoe-tying accessible, confident, and even fun.The Power of Visual Learning for Shoelace Tying
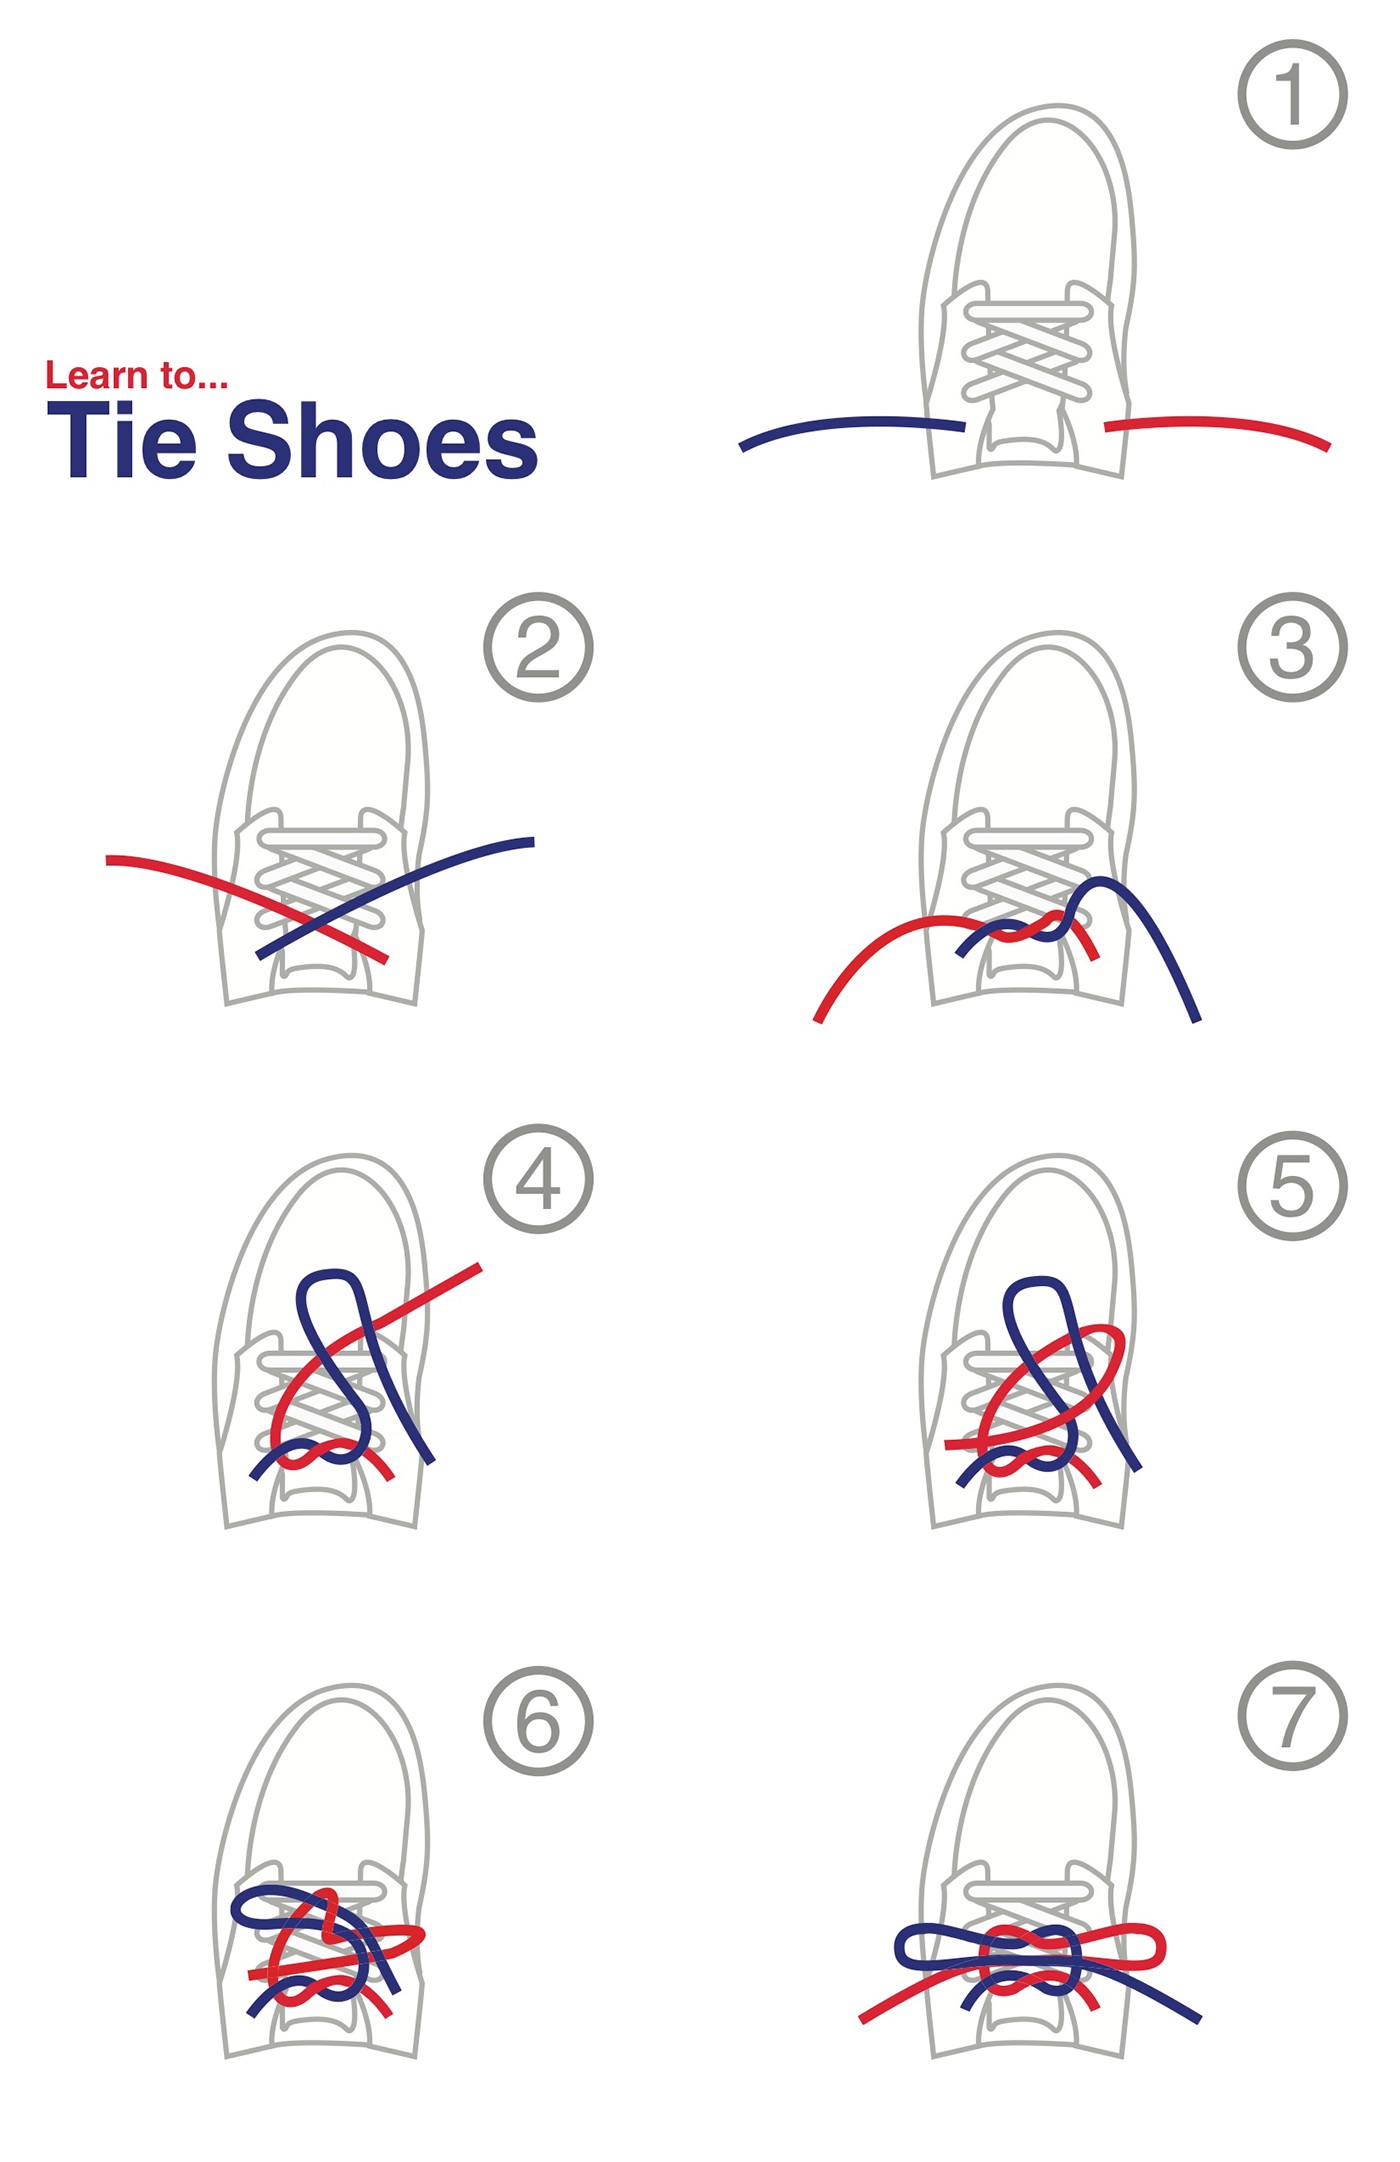
Step-by-Step: Learning to Tie Shoes with Pictures

- Step 1: Hold the laces. Share a simple photo showing one hand holding each lace. Keep the laces straight, naturally crossed to form a stable ‘X’—this sets the foundation.
- Step 2: Make a crossing knot. An image of the top lace tucked under and over the bottom lace clearly shows how to form a secure preliminary knot.
- Step 3: Pull tight and twist. A visual demonstrates pulling the open ends to close the knot smoothly while twisting both ends to lock it securely.
- Step 4: Form loops and secure. Picture illustrations show how to sweep one lace into a loop and wrap the other, helping thread the knot through without untangling.


 - wikiHow")