Master the Art of Shoe Tying with Our Easy-to-Follow Guide
Learning to tie your shoes is one of those essential life skills that feels surprising simple—yet, for many, it’s a daily challenge. Whether you’re tying a child’s sneakers, fixing your own boots, or just discovering a faster method, having an easy to follow shoe tying guide can make all the difference. Today, we’re walking you through a clear, step-by-step shoe-tying technique designed for beginners and seasoned keepers alike. No fancy knots. No confusing flips. Just reliable, easy steps you can master in minutes.Why an Easy-to-Follow Shoe Tying Guide Matters
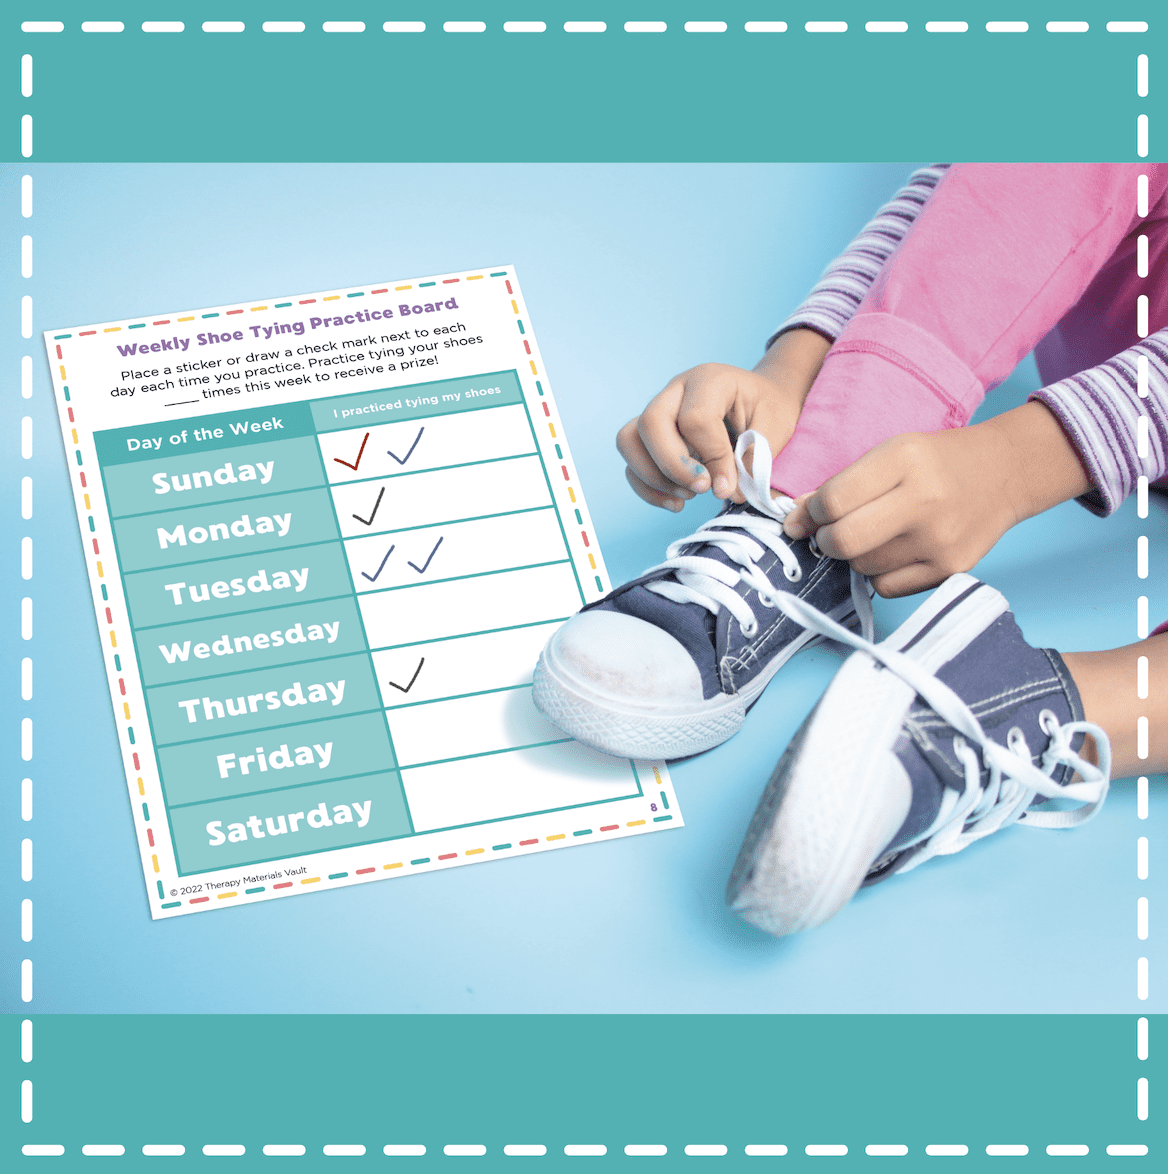
For kids learning to tie their shoes for the first time, the word “knot” can be intimidating. The process requires coordination, memory, and muscle memory—thick for tiny hands. That’s why an easy to follow shoe tying guide isn’t just helpful—it’s transformative. It breaks down the complexity into bite-sized actions. From crossing the laces to pulling tight, each step builds confidence. For adults too, revisiting a simple method helps reinforce good habits, saving time and frustration.Step-by-Step Easy-to-Follow Shoe Tying Technique
Such details provide a deeper understanding and appreciation for Easy To Follow Shoe Tying Guide.
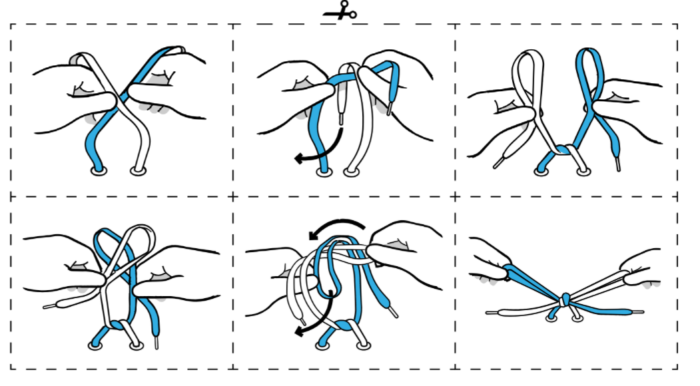
Follow these clear steps, and before long, tying your shoes will feel almost automatic:Step 1: Cross the Laces to Make an ‘X’
Start by holding both shoe laces firmly. Cross the left lace over the right, forming a clean ‘X’ shape. This simple gesture sets the foundation and prevents tangled confusion.Step 2: Begin the Lacing Pattern
Step 4: Create the Bunny Ears
Grab both lace ends and cross them in front to form two “bunny ears.” This step helps align the laces and prepares for the final tying motion.Step 5: Pull Tight with Confidence

As we can see from the illustration, Easy To Follow Shoe Tying Guide has many fascinating aspects to explore.
Pull each ear straight down while tightening gently. The goal is a neat, secure knot—not overdone or loose. With practice, your fingers will know exactly how much pressure to apply.Pro Tips for Faster, Reliable Tying
Using coloured laces can be a game-changer. Visual distinction makes verbal instruction clearer and helps kids (and beginners) see where each lace needs to go. Always practice with the shoe on a flat surface—instead of bending over a table or floor—to build muscle memory. And don’t rush! Smooth motion beats jerky tension. With repetition, this easy to follow shoe tying guide transforms a chore into a quick, satisfying habit. Want variety? Here are four widely recommended ways to tie shoes, starting with those easiest for beginners:- Standard Cross Knot: The classic ‘X’ method—proven, reliable, and easy to teach.
- Ian Knot – Rapidly secured with minimal tricks, ideal for anyone seeking speed.
- Loop King Laces: Designed for security and ease, letting lace ends guide loops for effortless tightening.
- Bunny Ears with Fold Loop – Combines a simple loop formation with crossing, doubling step reliability.


")


 - wikiHow")
