How to Set Up a Cricut: A Step-by-Step Guide
Are you eager to get started with your new Cricut machine but unsure about the setup process? Look no further! This comprehensive guide will walk you through the easy steps to set up your Cricut, from unboxing to your first project.
Getting Started
Before diving into the setup process, make sure you have the following items:
- The Cricut machine (Explore Air 2, Maker, or Joy)
- The power cord and wall adapter
- The USB cable (if applicable)
- The Cricut Design Space software (downloaded on your device)
- The user manual (in case you need reference)
Unboxing and Initial Setup
Begin by carefully unboxing your Cricut machine and checking the contents of the box. Typically, you'll find:
- The Cricut machine
- The power cord and wall adapter
- The USB cable (if applicable)
- The user manual
- The software installation CD (if you don't have the Design Space software downloaded)
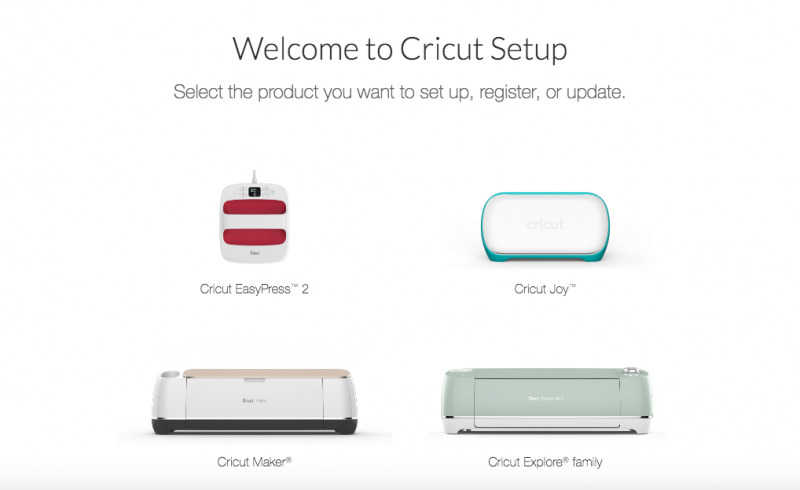
Installing the Software
Next, download and install the Cricut Design Space software on your device. This free software allows access to your files anytime and on any device. For Mac or Windows, follow these steps:
1. Open your web browser and navigate to the Cricut website.
3. Download the installation file.
4. Run the installation file and follow the prompts to complete the installation.
For Mac:
1. Open your web browser and navigate to the Cricut website.
2. Click on the "Design Space" button and select the Mac option.
3. Download the installation file.
This particular example perfectly highlights why How To Set Up A Cricut is so captivating.
4. Run the installation file and follow the prompts to complete the installation.
Loading and Changing Blades
Now that the software is installed, it's time to configure your Cricut machine. You'll need to load and change the blade, depending on the type of project you're working on.
Loading the Blade:
1. Locate the blade compartment on the Cricut machine.
2. Open the blade compartment by releasing the latch.
3. Remove the protective covering from the blade and insert the new blade.
4. Close the blade compartment and secure it with the latch.
Preparing the Material:
Before cutting your project, ensure the material is properly prepared. This may involve:
- Peeling the backing off the vinyl or iron-on material
- Trimming excess material
- Aligning the material with the machine's mat guide
Now that your machine is ready, it's time to connect to Cricut Design Space. Follow these steps:
For Bluetooth Connection:
1. Open the Cricut Design Space software on your device.
2. Locate the "Connect to Cricut" button and select it.
3. The Cricut machine will automatically detect the software and attempt to connect.
4. Authenticate the connection by following the on-screen prompts.
For USB Connection:
1. Connect the USB cable to the Cricut machine and your device.
2. Open the Cricut Design Space software on your device.
3. Locate the "Connect to Cricut" button and select it.
4. The Cricut machine will automatically detect the software and attempt to connect.
5. Authenticate the connection by following the on-screen prompts.
- Adjust the material settings in Cricut Design Space
- Calibrate the machine's mat guide
- Trim excess material
Get Creating!
Congratulations! You've successfully set up your Cricut machine and are ready to start creating. Explore the wide range of materials and projects available in Cricut Design Space, and don't be afraid to experiment and try new things.
For up-to-date support, free workshops, and education on all things Cricut, head to CricutLearn. Join us every Thursday live on TikTok at 8:30 pm for tutorials, Q&A's, and education on all things Cricut.
Resources:
For additional guidance, refer to the following resources:
- The Cricut user manual
- Cricut Design Space tutorials and videos
- The CricutLearn website and social media channels
Happy crafting with your new Cricut machine!
")


 - BRB, I'm Crafting")


")


")
